 By Carrie Antoniazzi (Grade 4/5 teacher; Wannabe astronaut)
This September, as students returned to the classroom, so did I. I have spent the past 5 years as a District Teacher Mentor at the Conseil Scolaire Francophone (School District #93) working out of the school board office and travelling to support teachers in our 38 schools around the province. During that time, I have witnessed many innovative teaching practices and participated in inspiring professional development. I knew that I wanted a classroom that reflects what I value in education and that meets my students’ needs as learners as well as my needs as a teacher.
As I stood in my classroom the week before school started, I was inspired by a design thinking activity that Dr. Kaleb Rashad (@kalebrashad) and Dr. Eric Chagala (@drchagala) led at #DesignCampBC in April. I didn’t want students to come into a space that I had designed for them, trying to guess their needs and making them feel like they were coming into my class. Instead, I would let them design their own classroom.
 Even better, I had attended Honeywell’s Educators at Space Camp this past June, and had learned the value of “missions” to have students work together to tackle tough problems. I planned to change the context of my students’ learning and to challenge them to organize the class layout. The activity would allow them to experience a design thinking activity and would start to build our classroom community. This would be our first “Mission du Mercredi”. So, on the second day of school, when the students walked in after recess, there I was in my flight suit ready to launch our first mission. I got some funny looks, but they were intrigued.
I asked my students to visualize the place or places they worked the best while writing, reading, or creating with an iPad at home. I walked them through a process of thinking about the furniture, the lighting, and the sounds or absence of sounds, that allowed them to concentrate and be productive. Once they opened their eyes, I had them draw these places. They then shared their drawings with a friend and we had a class discussion about how learning spaces can look different for everyone.
I then explained to them that every Wednesday, they would embark on a new mission. And that today’s mission was to redesign the classroom. I presented them with a variety of materials – milk crates, yoga balls, rugs, lamps, 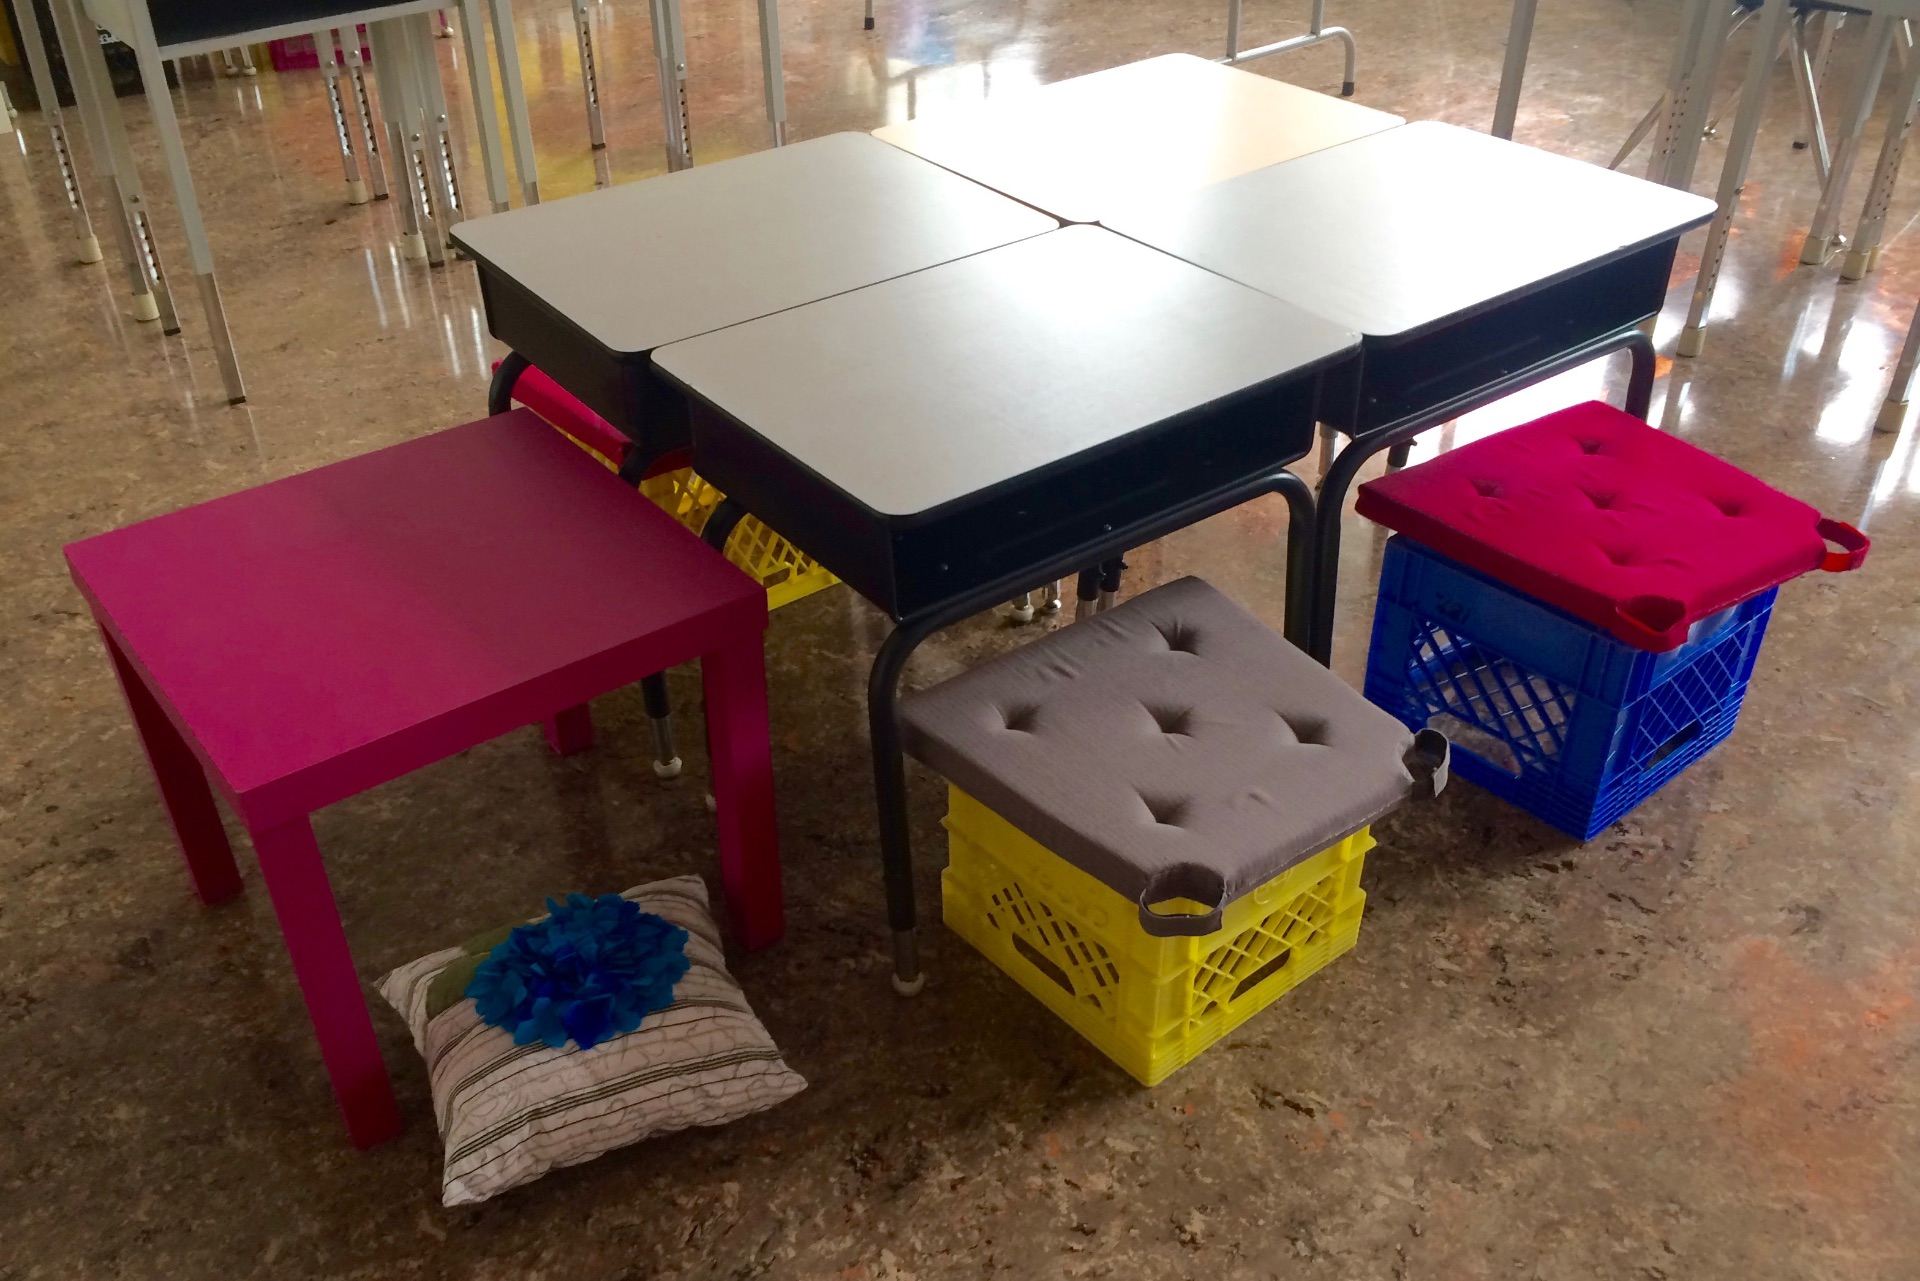 Allen keys, big and small tables and desks. I told them that they were free to move things around and test different options to see what would work best for them, while taking into account other students’ needs as well. Armed with graph paper, classroom dimensions, and measuring tapes, they were to create a plan to redesign our classroom.
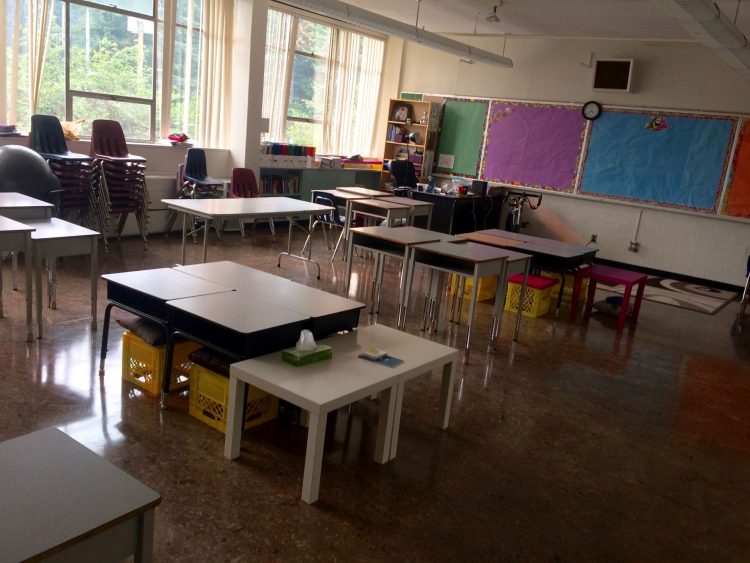
I expected students to jump up and start to move things around and use the Allen keys to change the desk heights. But other than 2 groups who unrolled a rug and designed a reading area, most of their plans were quite traditional. Desks were paired up or in rows of 3. They mostly faced the front of the class. After lunch, each group presented one element of the classroom from their plan, and we started to add them to our collaborative plan. Students mostly agreed on the features that other groups presented, and the one disagreement about rug placement was solved with a vote. When the students left at the end of the day, I rearranged the class to match that plan, our first classroom prototype.
I left looking at the class wondering what the students were thinking as they planned and left that night. I was disappointed in the ‘traditional’ feel of what they had proposed. But what I wanted was for them to design their class, and this is what they wanted.
The next day, after students had time to reflect on our activity at home, they started to realize that they had the freedom to be creative and innovative in my class. In the past week, the “traditional” seating has been getting less use. We lowered more desks and found more milk crates to fill the growing need for lower seats. I purchased some “bed tables” from IKEA for the students working on the rug. Parents brought in cushions for the students who wanted to sit on the floor. And by Friday, students finally started to use the shelving units as standing desks.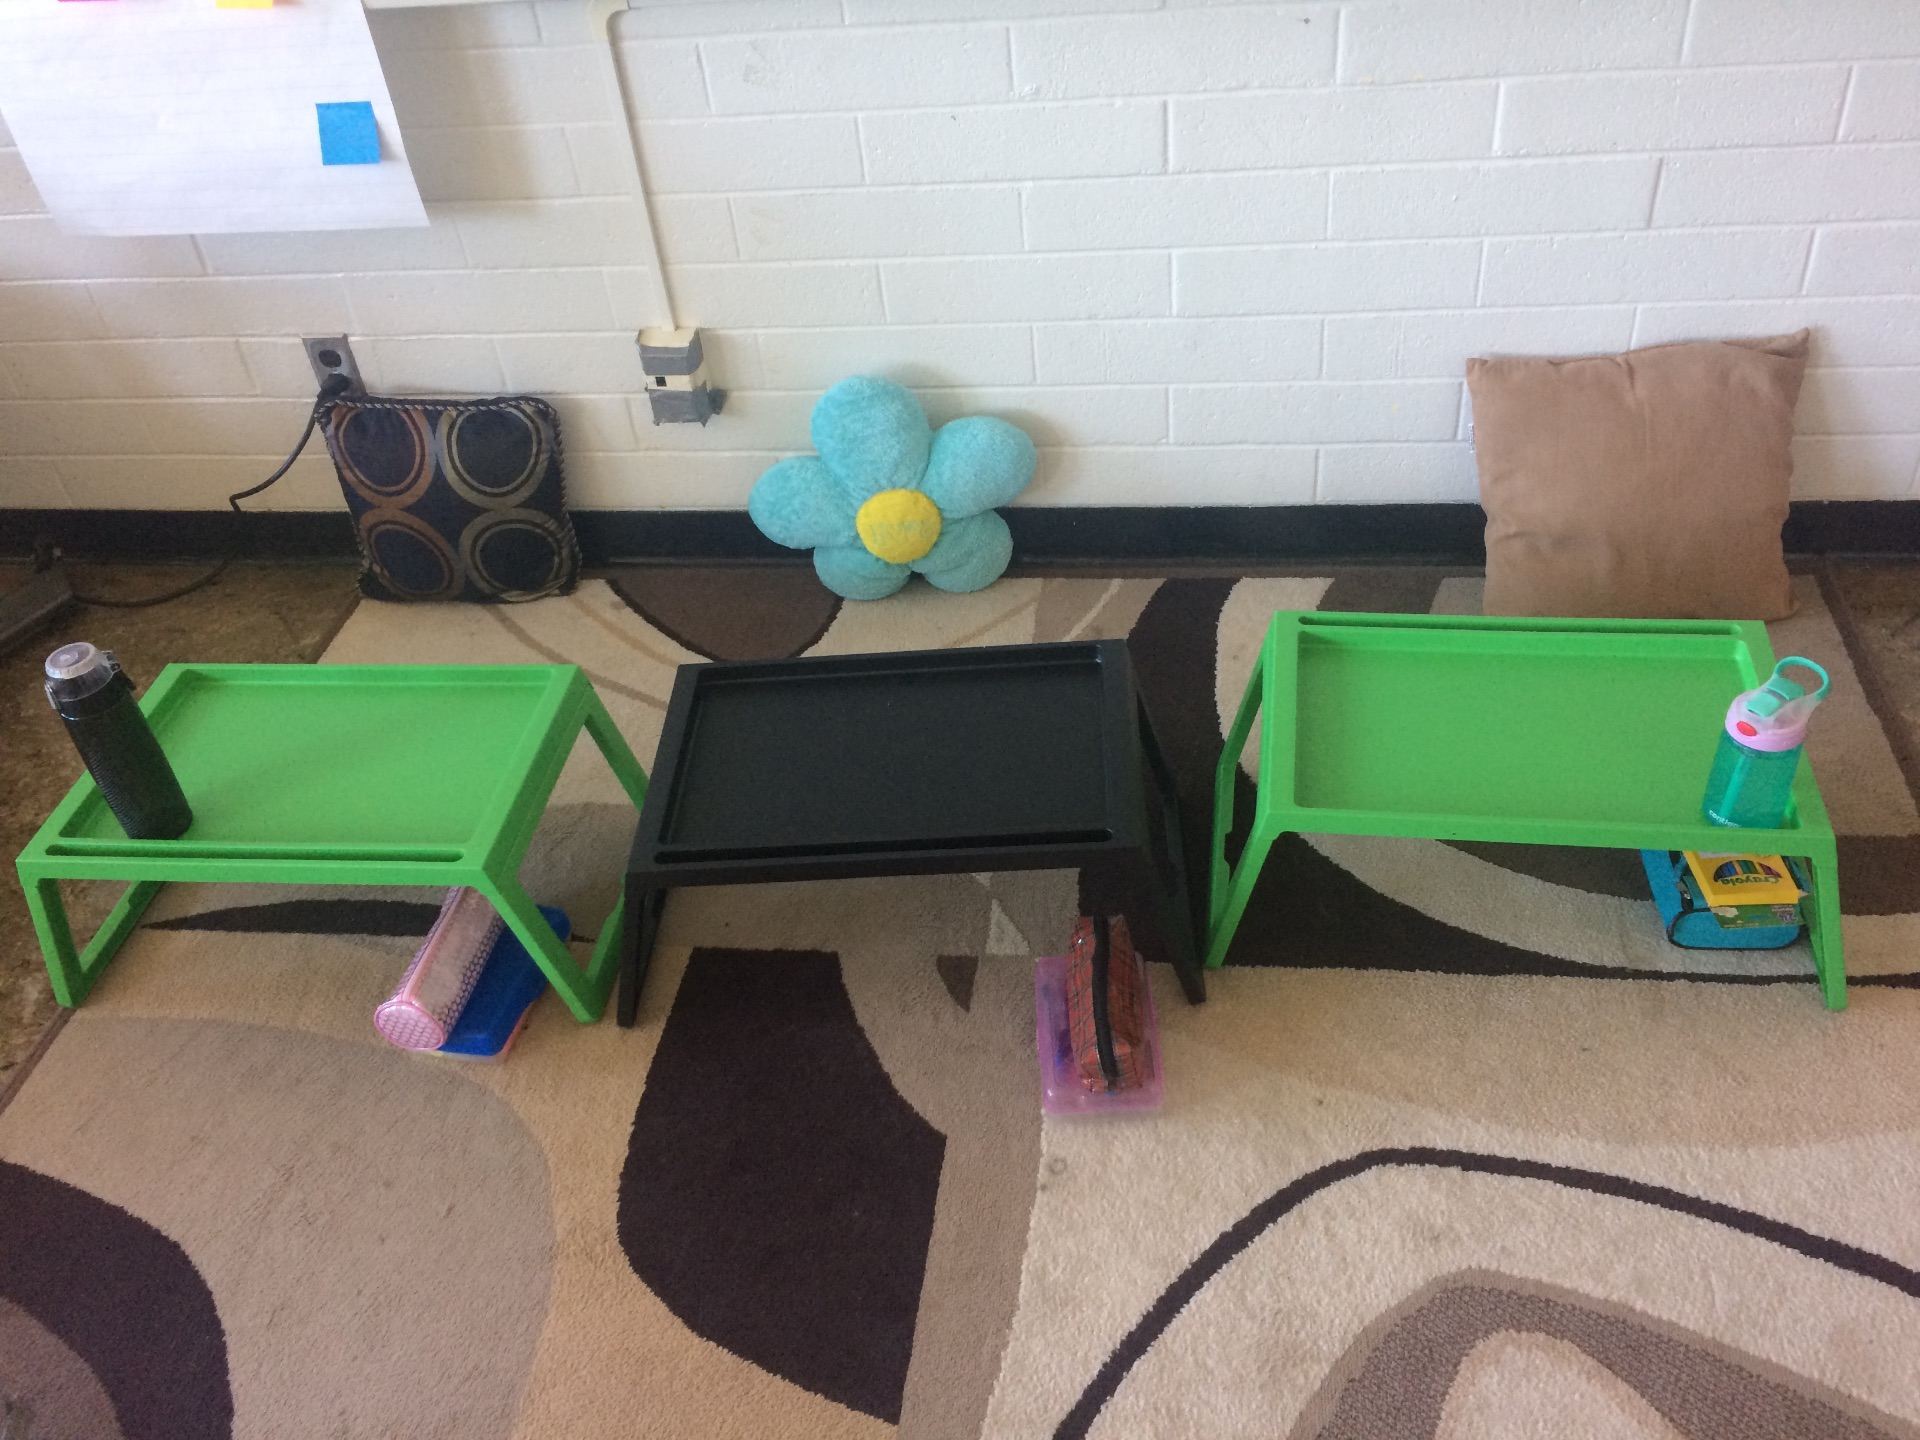 Although the physical setup of the classroom was the goal of this design activity, more important are the sense of community and the creative mindset my students are developing.
We have found that there are some challenges with our first classroom prototype and have been adjusting as we go. For example, we didn’t take into account the space the computer cart would take, the lack of storage for our personal items, and didn’t have a place for the projector. In a few weeks, our mission will be to review our class and to create our next classroom prototype with these challenges in mind and taking into account the new furniture that is arriving. I can’t wait to see what the students come up with!

This is wonderful! I have been wanting to try this with my students and wondered about the challenges. I think I will try it out in the weeks to come. Thank you for sharing your experience.
Thanks G! It was for sure worth it. Let me know how it goes !
I really appreciate the student ownership here in designing the classroom space. Was there a set of criteria or questions that you posed (or through student inquiry) to help students think critically about their choices?
I am thinking about students who are not accustomed to “unconventional” arrangements, who are not there *yet* with social and personal responsibility. Sometimes you have a class who is so ready for this ownership and for others there is a steep learning curve. How do you set this up for success so student ownership and responsibility is on the forefront of their thinking in the design process?
Thank you for this wonderful blog!
Hi Gina! I will alert the author of this post to your comment and ask her to reply 🙂
Thank you 😀
Hi Gina,
To be honest I didn’t really have a list of questions, I just went with the flow.
For the physical arrangement – We did a little bit of talking about our wants and needs from the imagery activity, and made sure that we thought of having a variety of options for all. However, will everything available online now, you could always pull out a couple photos of flexible seating options or classes and have your students compare them or point out what they would like in their classroom.
These students were not used to “unconventional” arrangements – I think that’s why our first prototype looked so much like a more ‘traditional’ classroom. Students will push as far as they are ready, and then, with the nudges from others or from teacher prompts, will continue to move out through the school year. I found that the later we got in the year, the more ‘normal’ it was for students to be working in different places. Under tables, on the ground, outside on the patio (we moved to a portable half way through the year due to school construction), in the cloakroom. We had a list of rules that we developed together, and any place they wanted to work that respected that was fine with me. Our rules were quite simple – I find a place where I can work well for how I am feeling today; I sit in the same place for the entire day (some exceptions were made – being outside for example); I sit somewhere where I can learn (i.e. – not with friends just because they are friends); If I interfere with other classmates learning, I will have to change places. These rules ment that in later designs, we ended up having a couple desks all by themselves, because some students found that they often needed to be all alone in their bubble to work.
My biggest suggestions is to be open to what the students say or show in their actions. Be there to support a lot at the beginning and watch them slowly take ownership as the year goes on.
I hope this helps! If you do have any more questions, let me know! Carrie
Thank you, Carrie! I love how these conversations with students help to develop a greater awareness and understanding of their learning styles and individual needs.